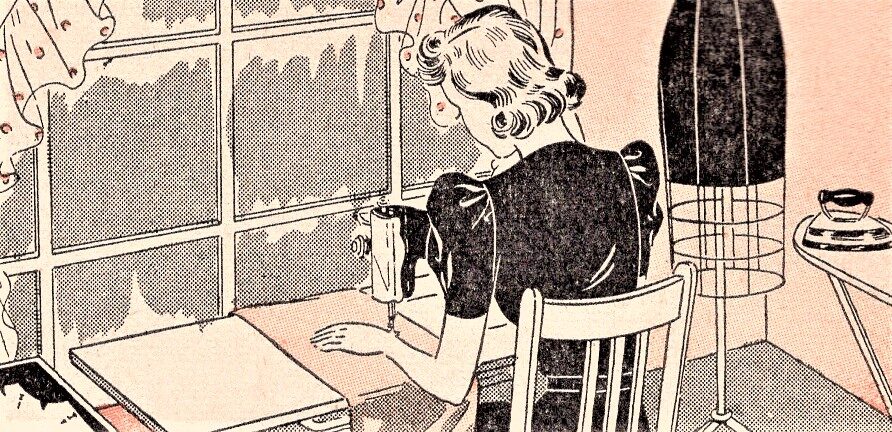
In many other ways, besides in plackets, Slide Fasteners have done a great deal to make clothes smarter, easier to get into and out of, and easier to make. When carefully put in, they give a costume a finished, professional air… Simplicity Sewing Book, 1944
Continuous Lap Placket For Dress

- a. Snip seam at both ends of placket.
- Cut a 2-inch wide straight strip a little longer than twice the length of opening.
- Stitch strip around with outsides facing, starting at top.
- b. Turn and hem down to row of stitching.
- c. Turn in front part of lap.
- Sew ends of placket strip together at top.
- Use hook and eye at waistline and snap fasteners for rest of placket.
Two-Piece Placket For Dress

- a. Cut a bias strip 3-inches wide and 1-inch longer than placket opening.
- Right sides together, stitch strip to back edge of opening.
- Turn strip to inside and fold through center as shown, to form an underlap.
- Turn in free edge and slip-stitch to seamline.
- b. Cut a bias facing 2-inches wide and 1-inch longer than placket opening.
- Right sides together, stitch to front edge of opening.

- c. Turn facing to inside. Press seam.
- Turn under free edge of facing and slip-stitch to garment.
- d. Back-stitch placket pieces together at top and bottom.
- Overcast raw edges.
- Sew snaps on placket.
- Sew hook and eye at waistline.
Placket For Skirt With Belting

- Turn under seam allowance at top of skirt.
- Face front edge and finish back edge with a double underlap as shown.
- Cut belting to exact waist measurement, plus an allowance for finishing.
- Turn under the ends and fell.
- Sew belting to skirt, leaving ends loose.
- Sew hooks and eyes to belting so that ends of belting meet.
- Sew snaps on placket.
Placket In a Pleat

Used most often in infants’ clothes.
- a. Slash desired length.
- Clip across lower end of slash an equal amount each side of center. The entire length of crosswise clipping will determine the width of your hem, finished.
- b. Finish each side of slash with hem and make lap by forming a pleat.
- c. Sew across lower end.
Underwear Placket

- a. Stitch a continuous strip 1¾-inch wide around the outside of the placket opening.

- b. Mark bottom of placket with pin.
- Trim off half the width of piece above pin.
- Turn in and stitch flat, forming over-lap.

- c. Turn in lap below pin and stitch forming underlap.
- Stitch box at bottom of placket.
- d. Placket from right side.
Shoulder Placket

When there is an opening on the shoulder of a garment, finish the front edge of the opening with a facing. Finish the back edge with an underlap. Finish the back edge with an underlap sufficiently wide for a neat closing..
- Turn in the neck-edge of the facing and the underlap 1/4-inch before applying.
- When placket is finished, slip-stitch these ends. Fasten snaps close to edge of placket, as shown.
- Sew socket side of snap to the underlap.
 The slide fastener (or zipper) greatly simplifies the finishing of a placket, and gives a neat, smooth line at the side of a dress. Buy a fastener of the length specified in you pattern. If for any reason you wish to use a different length, change length of opening in garment to correspond. When fastener exactly matches your garment, you may make the placket by the simplified method. If the fastener does not match perfectly, or if you do not wish it to show, use the lapped, concealed method.
Simplified Slide Placket – Plain Seam

- Close opening edges on seam line with a temporary long machine stitch, as shown. Press seam open.

- Pin zipper right side down over temporary seam closure, with center of metal teeth along seam line.
- Catch-stitch in place, as shown, being sure to keep garment edges in line of the outside.
- Remove pins. Turn dress to right side and run a basting stitch to form a slot-seam effect for the zipper, as shown.
- Begin basting 1½-inches below top of zipper and 1/4-inch away from seam line.
- Shape upper end if necessary, to make room for tab.

- Stitch from right side of dress, close to basting. Use the cording (or zipper) foot of your sewing machine.
- Remove all bastings and press placket. Zipper will be concealed, but not so completely as in a lapped placket.
Concealed Slide Placket – Lapped Closing

- Press open side seam of garment, to placket opening.
- Mark off seam allowance on each side of placket.
- Cut a facing strip the length of zipper tape and about 1¾-inches wide.
- Baste facing to front-edge of placket opening on outside of garment.
- Stitch.
- Turn facing to inside and baste as shown.
- Turn in back-edge of opening 1/4-inch beyond marked seam allowance, so that an underlap is formed.
- Press.

- Turn garment to right side.
- Place zipper under opening, right side up, and bring back-edge of opening close to zipper teeth.
- Pin to position, baste, then stitch close to edge.
Use the cording (or zipper) foot on your sewing machine when stitching in a zipper. Having only one prong, it allows the needle to come close to fastener teeth. It makes the work so much easier, that it is well worth the little trouble of changing attachments.

- After stitching back-edge, close placket perfectly and pin in to position.
- Baste along closing line, then carefully baste front of placket to zipper tape.
- From outside of garment, stitch front of placket to zipper tape, as shown.
- If the zipper tab is large, flare the stitching away a little at the top of the placket to make room for it.
- Remove all bastings and press placket. It should be smooth and neat, with the zipper well covered.
Lapped Placket For Skirts

Picture #1
- Put in zipper before applying band or belt.
- Cut a facing 1½-inches wide and 1-inch longer than zipper.
- Mark off seam allowance on each side of placket opening with a line of basting.
- Stitch facing to front of placket opening, on outside of garment. Turn to inside and baste edge as shown.
Picture #2
- Turn in back-edge of placket opening 1/4-inch beyond seamline, so that it laps under front edge of opening.
- Baste and press.
- Turn garment to right side. Close zipper and pin it in place under back-edge of opening. (Top of zipper should come about 1/2-inch below top of placket opening.)
- Baste.

Picture #3
- Using zipper foot on the machine, stitch back-edge of placket close to zipper teeth; then close placket, lapping front-edge 1/4-inch over back-edge.
- Baste along closing line.
- Turn garment to wrong side.
- Baste zipper tape to front of opening.
- Turn garment to right side and stitch front-edge of opening to zipper tape, keeping stitching close to zipper teeth.
- Press placket.
Picture #4
- For fabric guard under zipper, use a selvage strip of the skirt material 2-inches wide and 1-inch longer than zipper.
- Fold lengthwise through center, and sew along fold.
- Baste guard over zipper with selvage edge on top, and even with back-edge of zipper tape.
- Sew guard to back-edge of tape and across both ends, holding tape away from garment.
Separating Style For Coats and Jackets

The easy and neat way to apply this type of zipper is to sandwich it in between the edge of the garment front and the facing.
Picture #1
- Turn under the seam allowance on both sides of the front facing.
- Baste a facing to tape on each side of CLOSED zipper, placing the wrong side of the tape against the wrong side of the facing.
- Bring edge of facing close to zipper teeth.
Picture #2
- Fasten lower end of zipper tape securely to facing at each side.
- If metal eyelets are provided, draw a piece of strong tape through hole and baste ends of tape in position, so that they will be caught by the stitching when you sew zipper in place.
- Or you may sew through the hole with a strong thread. If zipper is not finished with metal ends, whip the lower edge of zipper tape firmly to facing.
Picture #3
- Turn under 1/8-inch more than the seam allowance on front edge of garment, baste and press.*
- Lay zipper and attached facing in place under one edge of garment, bringing garment edge close to zipper teeth and baste.
- Top-stitch close to edge of fabric. Leaving zipper CLOSED, baste other garment edge in place.
- Open the zipper. Top-stitch basted edge. Conceal tape ends in neck finish.
*If it is desired to have zipper concealed, turn under only the seam allowance on front edges of garment. Then, when zipper is put in place, these edges should be brought to center of metal.
Simplified Pocket With Slide Fastener

- Cut a pouch piece for the pocket twice the length you wish the finished pouch to be, plus 2-inches.
- Mark opening for pocket on garment. Right sides together, place one end of pouch piece in position over pocket mark, and on it make a line indicating pocket opening.
- Stich 1/8-inch each side of marking, and across ends. Slash as shown, clipping diagonally to corners of stitching.
- Turn pouch piece through slash to inside of garment. Press.
- Place zipper over opening, on inside of garment, and baste.

- Turn garment to right side and top-stitch around pocket opening, close to zipper, using the cording (or zipper) foot.
- If necessary, flare stitching away a little at tab end.

- Turn garment to wrong side.
- Whip free edges of zipper tape to pocket.
- Fold pouch in half as shown and stitch edges together, holding them free from garment.
This type of pocket is usually made for ornamental purposes, although it has very practical virtues. The zipper used for it should be a decorative one, of suitable style and color.
Decorative Sleeve Fastener

- Measure off length of zipper on sleeve seam, and slash seam diagonally at this point, carrying slash a scant 1/4-inch beyond seam.
- Turn back the edges of opening and press.

- Working from the wrong side of sleeve, baste zipper tape to sides of opening, holding turned-back seam edges free from the sleeve.
- Turn tape ends back at the bottom and tack.
- Stitch sides along basting, again holding seam edges free from sleeve.
- Baste tape ends to edge of opening at top, and stitch across twice, holding fee from sleeve.

- Finish bottom of sleeve with a facing wide enough to cover tape ends of zipper.
This method may also be adapted for inserting an exposed zipper at the end of any seam.


Johanne Kemp
Just discovered this from your instagram page – fantastic articles thank you for the time it has taken you to write/photograph these articles. So appreciated thank you.
SewDecadesAgo
I am so happy you discovered my blog! Thank you for taking the time to read and to comment – I really appreciate it. And it is my pleasure to write these posts to take some mystery and confusion out of sewing vintage and historic garments 🙂
Judith
Very informative. Thank you.
SewDecadesAgo
I’m glad the blog post was informative. Thank you for taking the time to read it.